
Venk
Glod Menbie
-
Joined
-
Last visited
Everything posted by Venk
-
 As I've told you countless times already, read the instructions... Read the instructions here:
 -
There is nothing wrong with Eddynet, you're just not reading the instructions properly... Read the instructions here:
-
In addition to the above comment, I also wrote some guides on being a server owner and making sure your server does well. Feel free to check these out.
-
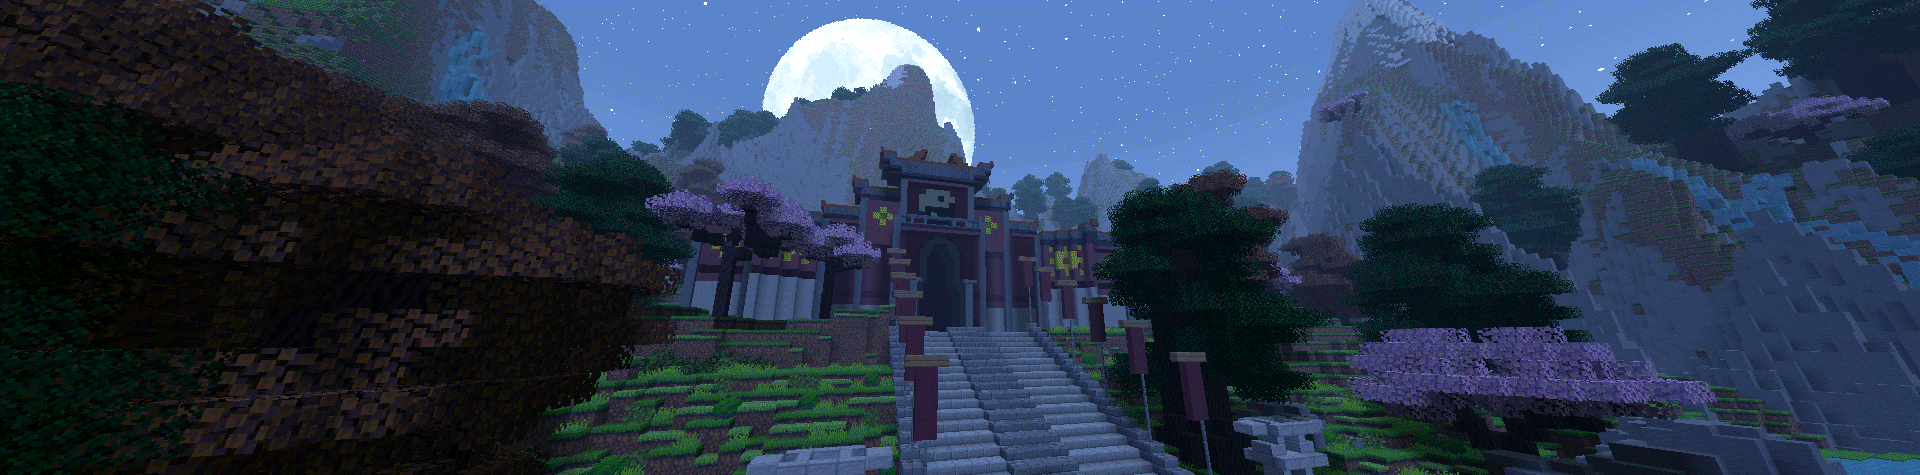
Here are a list of other tutorials in the series: Chapter 1 - Introduction to building/building philosophy Chapter 2 - Familiarity with common commands/usages COMING SOON! Chapter 3 - Basic geometries and build styles COMING SOON! Chapter 4 - Detailing your builds COMING SOON! Chapter 5 - Creating and landscaping terrain COMING SOON! Chapter 1 - Introduction to building/building philosophy Having been a builder for around 11 years now, I think it's safe to say I've definitely learned some things and techniques through the years and these guides will hopefully help you improve on becoming a better builder. Before we start, I'm aware that many of you are eager to get to building - which is great! - and will likely skip this first chapter. I can safely say that this chapter is the most crucial and essential chapter in the series and skipping it will make the building process harder than it has to be. Planning your builds Many people like to rush into building without having an idea of what they're actually going to build. While this may work for some, for the rest of us, it makes building awkward and oftentimes we will lose inspiration quite quickly or head in a direction that we're not happy with. You should have a mental image of what you're wanting to build in your head. The more detail you provide, the better your build will be. Here are some examples taken from the Not Awesome 2 server. Keywords are highlighted in bold. "I'm going to build a cozy, Elven house with some trees surrounding it." Build created by Westbeam. Map: westbeam+2 on Not Awesome 2. "I'm going to build a European village with lots of buildings and next to some hills." Build created by okias (saiko). Map: okias+11 on Not Awesome 2. "I'm going to build a suburban neighbourhood with a city backdrop." Build created by StarlightGlimmer. Map: novacity on Not Awesome 2. Gathering inspiration Much like all great art pieces, artists need to gather inspiration from somewhere. Whether it be from your friends, builders you look up to or from the internet, inspiration can be found literally anywhere. A method I use quite often is going onto Google images and searching for "[whatever you're after] ArtStation". The reason I use ArtStation for inspiration is because it is home to some of the craziest artists I've ever seen and there is an endless supply of inspiration to be found there. After you've found some inspiration, it's important to know the three Rs of building: Remixing, Replicating and Ripping Off. Remixing Remixing occurs when you find a source of inspiration and you put your own spin on it to make it look unique. It's probably the most common of the three. It doesn't have to look exactly the same but you should be getting inspiration towards certain things from the source. For example in the images below, I wanted to make a medieval gate for my city so I decided to use a similar shape as the original image in my build. "Castle Gate" created by Jonathan Dufresne sourced from: ArtStation. Build created by Venk. Map: venk+1 on Not Awesome 2. Replicating To replicate something is to remake it almost the exact same as the source. I like to replicate things to learn new styles and from there, I can incorporate those styles into my future builds. "Statue Forest" created by Daniel Riise sourced from: ArtStation. Build created by Venk. Map: riise on Not Awesome 2. As you can see, I've started to replicate the image here by building it to look the same. Ripping Off Ripping Off is something you should not do, ever. Similarly to replicating, ripping off is making something exactly the same as something somebody else did, but claiming you made it entirely yourself without even acknowledging the original source. I've had a couple of instances of my maps being plagiarized over the years and it's definitely not a great feeling. Mapping out your builds Labelling Now that you've got an idea in your head and some inspiration, let's put it to work and start building it. When starting a build, you should always try and map out what is going to go where before actually starting to build. To do this, most servers have a command to write text. In MCGalaxy, it is /write, for others it may be /writetext or something else. Below is an image of one of my maps after labelling what I want to go where. Build created by Venk. Map: venk+ on Not Awesome 2. As you can see, I've labelled things like library and tavern so I know that a library and tavern will go here. Creating assets Assets are a nice and easy way to fill up your map quickly. While most people like to make all of their buildings unique and individualistic, using the same building once or twice isn't harmful at all. Away from your build - often in the sky -, you should make buildings or trees, essentially whatever assets you're planning on using later. This is so we can /copy them easily without getting the nasty excess blocks that we would get just copying from within the build itself. Build created by Venk. Map: venk2 on Puissant Royale. After you've created an asset bundle, you can start copying and pasting some of these builds into your main build. Build created by Venk. Map: venk2 on Puissant Royale. Colour coordination Colour coordination is a great way to identify things and assort them into groups. You should try and use blocks and colours that you aren't using in your build as it can be quite confusing when removing the labels. Below is an example of using colour coordination to plan directions for a road system. Build created by okias (saiko). Map: okias+15 on Not Awesome 2. Of course, this technique can be used in many different ways. For example, I use it to focus on areas that need to be worked on more than others. Build created by Venk. Map: ombshire_old on Puissant Royale. To-do lists To-do lists are probably the best method of monitoring your progress and knowing which areas need to be worked on. Surprisingly, not many people use this technique in their builds but you'll notice that the best builders use this technique quite often. Using that /write command we discussed earlier, we can make checkboxes which we can cross off after we've finished an area. Build created by okias (saiko). Map: ochre2 on Not Awesome 2. Maintaining focus and motivation Oftentimes when I build, I lose a lot of motivation on a project. In-fact, I'm notoriously known for having so many unfinished projects, it's scary. The reason for this is because I am constantly coming up with new ideas and want to build them all before I lose the flow, which I do recommend. If you're losing motivation on one of your builds, take a break from it and come back another time. If you keep going with no motivation/interest to keep going, chances are it will make the build seem like a chore and eventually, your build may start to go down-hill and you'll be unhappy with your project. Building is something you should do for fun, not as a chore.
-
You can find a direct link to the plugin here.
-
* Please note that I did not create this guide, I just thought that since not a whole lot of people check the archived forums, this would be a better place for it. The original guide was created by Empy and can be found here. Full credit goes to them. * Additionally, I'd like to state that you do not have to do this for each custom block you create as it would take an excessively long time. I recommend making use of /gb copy [id] and /gb edit [id] [value] [args] as it is so much quicker and more efficient than following through with the creation process.
-
Got bored so I wrote a guide just for you, here you go:
-
Having been a server owner for over 9 years now, I think it's safe to say I've been around long enough to see what works and what doesn't. Many people think having their own server makes them "cool" or "special" and rush into creating a server without knowing any of the essentials. Hopefully upon reading this guide, you'll understand what to do and what not to do. Knowing what your server will be about This is the most integral part in coming up with your own server. Before starting your server, you should have a general idea on what you want your server's purpose to be. The majority of servers on this site are effortless and generic freebuilds that offer little-to-nothing except for a freebuild map and overseer maps. You'll notice that these types of servers rarely get players because they are inherently boring and bring nothing new to the table. If you really want to stick with the freebuild genre, you should at least come up with some ideas on extra features to add to the server to ensure people don't get bored. Here are some ideas you could try: Themed freebuild maps An economy/money system Unique commands/plugins A server theme. E.g, oriental/fantasy, sci-fi/futuristic, modern, medieval etc. Your server's image Server name So you've come up with your server idea, now you just need a fancy name to lure the players in. You should include something related to your server's genre in your server's name. For example, if you are running a zombie survival server, you could set it to something like this: [Zombie Survival] Reign of Blood . This will tell people what your server is about and improve your chances of getting them to join. You should try and stay away from names that include your username. For example, Venk's Server. This is very boring and people probably won't join. Maturity and professionalism The way your server comes across is very important. If you want your server do well, you should typically stay away from messages that are rude or contain swearing/slurs. Don't get me wrong, there are a bunch of toxic servers out there that occasionally do well but at the end of the day, they all die out eventually. Grammar and punctuation is optional but it helps a lot. You should avoid stuff like this in any form of representations of the server: Bad: if u guys wanna go to other maps u should type the cmd /goto map Good: You can join other maps by typing /goto [map]. In regards to maturity, you should at least try and act mature but you do you... Below is an example of what to include and not to include in your rules. Bad: dont grief or u'll be banned!! WE DONT ALLOW GRIEFERS ON THIS SERVER SO JUST DONT!!! Good: Griefing is not allowed on the server. Hiring the right staff Chances are, you're not going to be on the server all the time, right? Having trustworthy staff online is a huge help and will heavily benefit you further down the track. Every server has their own expectations of staff but here is a template on what to look for in a staff member: Have they been active on the server? If they've only been on for like a couple of hours total, they're probably not a great choice as you may not know much about them. If they ask for staff, don't give it to them. Back in the day we used to call these people "Leeches" and muted them right off the bat... Are they respectful towards other players? You should probably refrain from hiring someone who is constantly carrying on and being rude to other people. This should ultimately go without saying but don't abuse your power. Just because you have a higher rank than someone doesn't mean you can behave like an ignoramus. I've seen countless instances where staff members abuse players and it's just despicable. You should also put your personal feelings towards someone aside and only punish them if they've actually violated the rules. "I just don't like them." is not a valid reason to punish somebody. Aesthetic Server hub If you want to provide a memorable experience for your players, you should make the server visually pleasing. A good-looking server hub or lobby is a great start as it immediately shows players that you've put some time into the server. If you don't consider yourself a good enough builder, I recommend asking a friend that you think is a good builder and see if they are willing to help. Colour scheme This might not seem to be that important but colours also help promote visual aesthetic. You should try and stay away from setting colours that are so bold and defining such as black, gray, maroon or navy. These colours are quite irritating to look at when used frequently. In MCGalaxy servers, you can add your own colours with the /customcolours command. Textures and block palette If your server software doesn't support these features, feel free to skip this section. As much as the default textures provide a sense of nostalgia, it gets old fast and people want to try something new. More tips coming soon!
-
Before we start: * Welcome to the MCGalaxy guide. Before reading onward, please do note that this guide is initially made for MCGalaxy version 1.9.0.6, as such, some of the things stated below may not work in either past versions. If not, tell me and I will update it. * Starting the server Starting the server and actually making it so it's online is the most crucial thing you're going to need to do in this guide. Everything else will be informative and/or optional. To start the server, make sure you download your release from here, keeping in-mind I will be using 1.9.0.6 to explain things. Once downloaded, you will need to extract the contents into a folder somewhere. Once complete, you will then need to run either MCGalaxy.exe or MCGalaxyCLI.exe. This will open up a GUI/CLI menu allowing you to edit the server. Next, you will need to port forward. If your router does not support UPnP portforwarding, you can find a guide on how to port forward here. If it does support UPnP port-forwarding then proceed to read on further. Upon opening the GUI, click the properties button. A menu like this should open (yours will likely be different): Next, you will need to enter a port in the port box (or keep it as 25565) and then click Server Port Utilities. Another GUI menu should pop up, here you will need to enter the previous port number into the box and then click Forward. If the forward was successful, you will receive a green Ports forwarded successfully using UPnP message. If not, then you will need to port forward manually by visiting the link above. Once you've done that, click out of that and press Save to save your progress. Voilà! Your server is ready to play. It should be around the bottom area of the server list, if it isn't try refreshing. Configuring your server Editing server properties is probably the most fun part of starting a server, you have full access to features and you can toggle things you want enabled/disabled on the server. To do this, you need to open up that folder we were talking about earlier and navigate to the /properties folder. In here there will be 8 files that you can edit customize. You can also edit things from the GUI, but this gives you a bit more options to choose from. The only one you really need to check out is server.properties, if you've never edited a .properties file, you can open it in any text editing program. A guide is already waiting for you inside the file. A great way to display information is via the use of text files. You can modify the text files by going to the /text folder. Here you can edit things like the server welcome message, rules, news etc. All files can be opened via text editing software as well. Using the console The console is used as a way of executing commands without having to be in-game. It also bypasses permissions so you can use any command from any rank with ease, though keep in mind, some commands purposely disable use from the console. Using commands is similar to in-game, which uses /[command]. If a / or ! isn't present at the start, it will be treated as a chat message. You should probably give yourself the superop or nobody rank to get full control of the server. See below for more information on assigning ranks. Ranks Ranks are the assortment of players into hierarchical groups. To modify ranks, you will need to open the properties menu and then click on Ranks. Here you will be able to edit permission levels and colours etc. To rank a player to a specific rank, you will need to use /rank [username] [rank]. This will give them access to all the commands and permissions the specified rank has. Commands and Permissions Commands are a great way of doing things in-game, but if everyone has the same permissions, the server could be come anarchic quite fast. One of the commands you will need to become familiar with is /cmdset which is the nobody rank by default. Using your console knowledge from before, typing /cmdset cmdset [rank name] will allow the rank of your choice and above to execute it from in-game. You can either keep the permissions as is (not recommended) or you can modify the permissions to your choosing. You can allow specific ranks to use a command by using /cmdset [command] +[rank name], this will allow the rank to use the command even if they are not above the default command rank. You can also do /cmdset [command] -[rank name] to prevent a specific rank from using the command. And lastly for setting command permissions is /cmdset [command] [rank name] [extra permission number] which will allow the rank specified and above to be able to use the command's extra permission. A full list of commands can be found via /commands all all and each are colour-coded to their respective rank colours. Information can be found for each command using /help [command]. Levels (or worlds/realms/maps) Levels are a world that players can visit/build on. By default the main level will be called main, but you can change that later by doing /main [level]. Most MCGalaxy servers support overseer levels which allow players to have their own private world that only they can build in. To allow this, just set the /overseer command to the lowest rank you want to be able to use the command. This will allow people to use /os map add and /os go as well as other overseer commands. To create a new level that isn't a realm world, you can type /newlvl create [map name] <width> <height> <length> <theme> <seed> (the ones in angled brackets are optional). If you're unhappy with the map size, you can change the size via /resizelvl [map name] [new width] [new height] [new length]. Keeping in mind, that decreasing a level size may remove blocks. Levels can be renamed via /renamelvl [map name] [new map name] and can be deleted via /deletelvl [map name]. Conclusion There you have it, you now know everything you need to about setting up your very own MCGalaxy server. Something not making sense? Still confused about something? I'm usually around the community and am quite happy to help. You can find me on Discord via @Venk#2020 or on ByteIRC via #PuissantRoyale.